Showing posts with label desserts. Show all posts

Wednesday, October 12, 2011

Pumpkin Pie with fresh pumpkin and a homemade crust!!


  • 1 cup sugar
  • 1.5 teaspoon ground cinnamon
  • 1 teaspoon ground nutmeg
  • 1/4 teaspoon cinnamon
  • 1/4 teaspoon ginger
  • one half teaspoon ground ginger
  • one half teaspoon salt (optional, I don't use any)
  • 4 large eggs
  • 3 cups cooked pumpkin (the stuff we made earlier)
  • 1.5 cans (12oz each) of evaporated milk
Mix well using a hand blender or mixer.
Notes: The vast majority of people tell me this is the best pumpkin pie they've ever had. It's light and fluffy - however... if you want a heavy, more dense pie, use 3 eggs instead of 4 and 1 can of evaporated milk instead of 1.5)

Step 11 - Pour into the pie crust

I like a deep, full pie, so I fill it right up to about one quarter to one half inch from the very top.Don't be surprised if the mixture is very runny!  It may start as a soupy liquid, but it will firm up nicely in the oven! * I place my pie pan on a cookie sheet before pouring mixture into crust so it is easier to move from the counter top to the oven.


Step 12 - Bake the pie


Bake at 425 F (210 C ) for the first 15 minutes, then turn the temperature down to 350 F  ( 175 C ) and bake another 45 to 60 minutes, until a clean knife inserted into the center comes out clean.
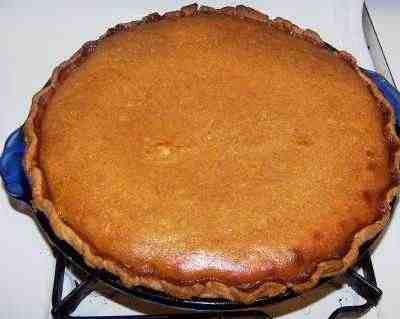
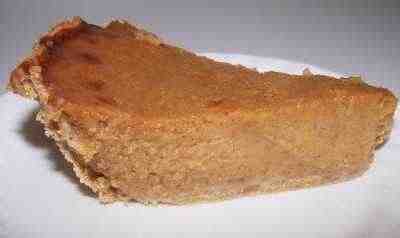
Here is the finished pie, right out of the oven.
I use a blunt table knife to test the pie. It should come out pretty clean when the pie is done.

Step 13 - Cool the pie

And enjoy! Warm or chilled, with whipped cream , ice cream or nothing at all - it's great!
Tuesday, October 11, 2011

Flaky Homemade Pie Crust!

What You'll need:

makes 1 deep dish 10" pie shell

  • 1.5 cups flour (about 6 ounces by weight) - plain flour, not self-rising.
  • 2 tablespoons sugar
  • 1/2 teaspoon salt (optional)
  • 1/6 cup COLD vegetable shortening -  Here's a useful conversion: 1/6 cup = 2 tablespoons + 2 teaspoons
  • 1/3 cup COLD butter
  • 1/4 cup cold water

Step 1 - Mix the ingredients


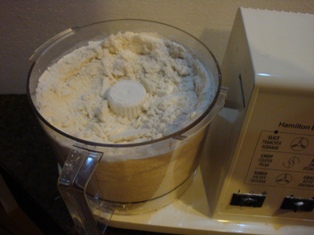
Mix the flour, sugar and shortening first. About 15 seconds in a food processor is by far the best way, since it is fast and the ingredients don't warm up much.  Don't make it too smooth or uniform.  Little pea sized granules makes a flaky crust.
pie dough in a food processor
Note: Alton Brown on the Food Network suggests using 1/6 cup vegetable shortening and 1/3 cup butter (for a total 1/2 cup of both together); because they will melt at different temperatures.  It makes a a lighter, flakier crust.  Another key is to keep all the ingredients, especially the butter, shortening and water are very cold.


Step 2 - Mix and add water as needed


Then sprinkle in the water, just enough water to make it hold together; a good dough consistency. A pastry blender (see photo) works very well to mix, but some people prefer a few seconds in a food processor instead. Just mix it enough to make it into pieces that hold together about the size of a pea.  We don't want to overmix it!

Chill?


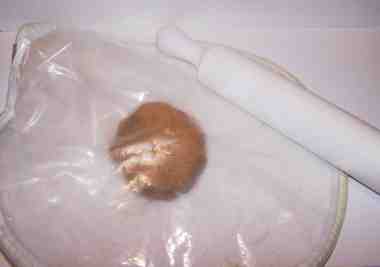
If you have time, put the dough (wrapped in plastic wrap or a ziploc bag) into the fridge to rest and chill for a half hour or more. If you don't have time, don't worry, just move on to step 3. 


Step 3 - Roll out the dough


I use a pie crust bag (a circular plastic bag that zips up around the edge, but two pieces of waxed paper will work). A couple of tablespoons of flour shaken in the bag will help to keep the dough from sticking to the bag.


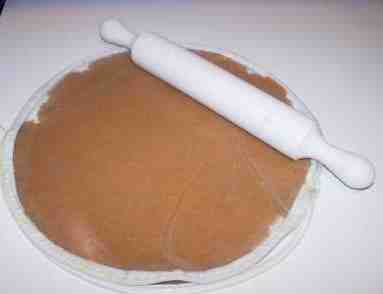
Roll it out to an even thickness, and just an inch or two wider than your pie pan.  My crusts are about 1/8 inch thick.


Step 4 - Put in the pie pan and shape!


Place the dough into the pie pan.  Don't worry if it breaks.You can easily fix it.


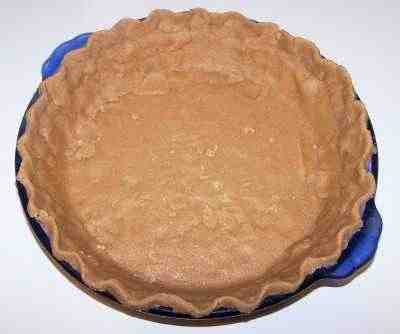
Press the dough into the pan, seal any broken areas, and shape the top edge in any pattern you like; just for appearance's sake.


It's now ready for you to add the pie ingredients! It is also time to start preheating the oven.  Turn it on and set it to 425 F.

Next I'll post the recipe for the actual pie! Soooo Delicious! 


Monday, October 10, 2011

Jack-O-Lantern Pumpkins for Delicious Pies!

Jack-O-Lantern Pumpkin
 Have you ever bought a Jack-o-lantern pumpkin and intended to carve it but just never got around to it? Well here is a little tip! You can use that pumpkin to make pies! Normally you would use what is called a Pie pumpkin, which is smaller and sweeter but I'm going to show you how you can use a regular Jack-o-lantern pumpkin! (Never "recycle" a pumpkin that has been carved or has been gutted and sitting at room temperature for more than a few hours. Mold and other bacteria will have started to grow!!!)


1. Wash the exterior of your pumpkin (just water no soap) then cut the top off and gut the inside. You can keep the seeds if you plan on roasting them.


2. After the pumpkin is clean (inside and out) cut into small manageable sections that will fit into your cooking pot.


3. Cook your pumpkin. There are many methods to doing this but here are the two I use;

 Method 1: Microwave! Place pieces of pumpkin in a microwave safe bowl with 1 to 2 inches of water in the bottom, cover it, and put in microwave. (20-30 mins)

Method 2: Stove top! Place pieces of pumpkin in a double pot steamer for 20 to 30 mins.
 Either way you choose continue to cook pumpkin until it is soft enough to scoop the innards away from the skin.


4. Let cool then begin to scoop out the pumpkin. Once the pumpkin is cooked it will be easy to scoop away the innards from the skin.  Place the pumpkin in a bowl. 
(Pumpkin too watery??  let stand for 30 minutes then pour off any free water)


5.Puree the pumpkin to a nice smooth consistency. By blending it you will give the pie a smooth, satiny texture.


You are now done with the pumpkin! You can place the fresh puree in baggies and freeze it. You however cannot "can" pumpkin for health reasons!


Next I will show you how to use this pumpkin puree for homemade pumpkin pie! and I will post my favorite recipes that call for pumpkin!